
Wilcom is the software most professional embroidery digitizers use to turn a logo or design into a stitch file a machine can read. Having trained other technicians on Wilcom for years, one thing comes up on almost every project: the quality of the final embroidery depends as much on the artwork you start with as on the software settings. This guide explains what Wilcom actually does, and what you can do before sending your logo to a digitizer so the result matches what you had in mind.
What Wilcom Does That A Regular Design File Cannot
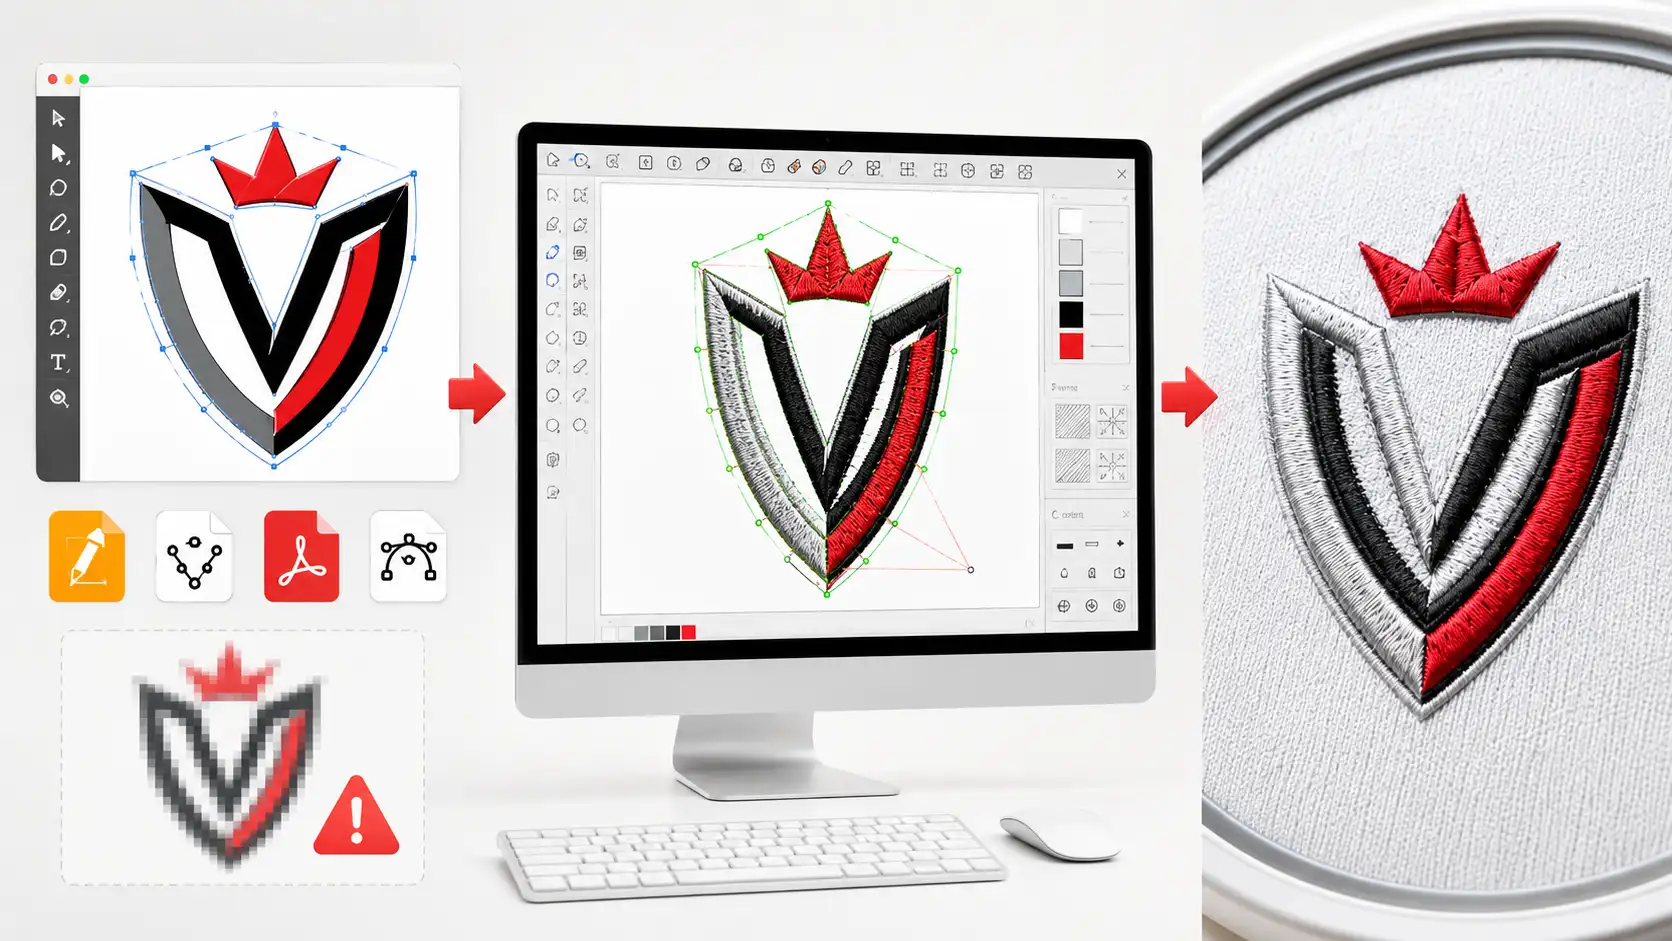
A logo file made in Illustrator or Photoshop tells a printer where to put ink. Wilcom does something different: it tells an embroidery machine the order, direction and density of every single stitch. Wilcom lets a digitizer assign stitch types (satin, fill, running stitch) to each part of the design, set underlay to stabilize the fabric, and adjust pull compensation so the design does not distort once it is actually stitched. None of this exists in a standard logo file, which is why a logo cannot go straight from Illustrator to an embroidery machine.
Preparing Your Logo Before It Reaches Wilcom
Most delays and revisions in digitizing come from the artwork stage, not the software itself. A few changes on your side make the whole process faster and the result more accurate.
Send Vector Files When You Can
A vector file (AI, EPS, PDF, SVG) keeps every line and curve sharp no matter the size. A low resolution PNG or JPEG forces the digitizer to guess at edges and colors, which slows down the work and increases the risk of small details being lost. If you only have a raster logo, a printed sample of your original branding helps confirm colors and proportions.
Simplify Fine Detail And Small Text
Embroidery thread cannot reproduce very thin lines, tiny gradients or text under a certain size. If your logo has fine serif fonts, thin outlines or detailed shading, expect a digitizer to simplify these elements. Deciding in advance which details matter most, usually the main shape and colors, saves back and forth once digitizing has started.
Confirm Your Colors In Thread Terms
Screen colors (RGB or Pantone) do not map directly to embroidery thread colors. Sending your brand’s Pantone codes, or samples of previous embroidered pieces if you have them, helps match thread colors accurately instead of guessing from a screen.
Tell Us The Fabric And Placement
The same logo digitizes differently on a leather vest, a polo shirt or a stretch jacket. Density, underlay and pull compensation settings in Wilcom all depend on the fabric and where the logo will sit on the garment. Sharing this information before digitizing starts avoids producing a file that needs to be redone for a different fabric later.
A Simplified Look At The Wilcom Workflow
While the technical settings are handled by the digitizer, understanding the basic steps helps explain why digitizing takes real time and skill, and why a properly digitized file is worth paying for.
Import And Trace The Artwork
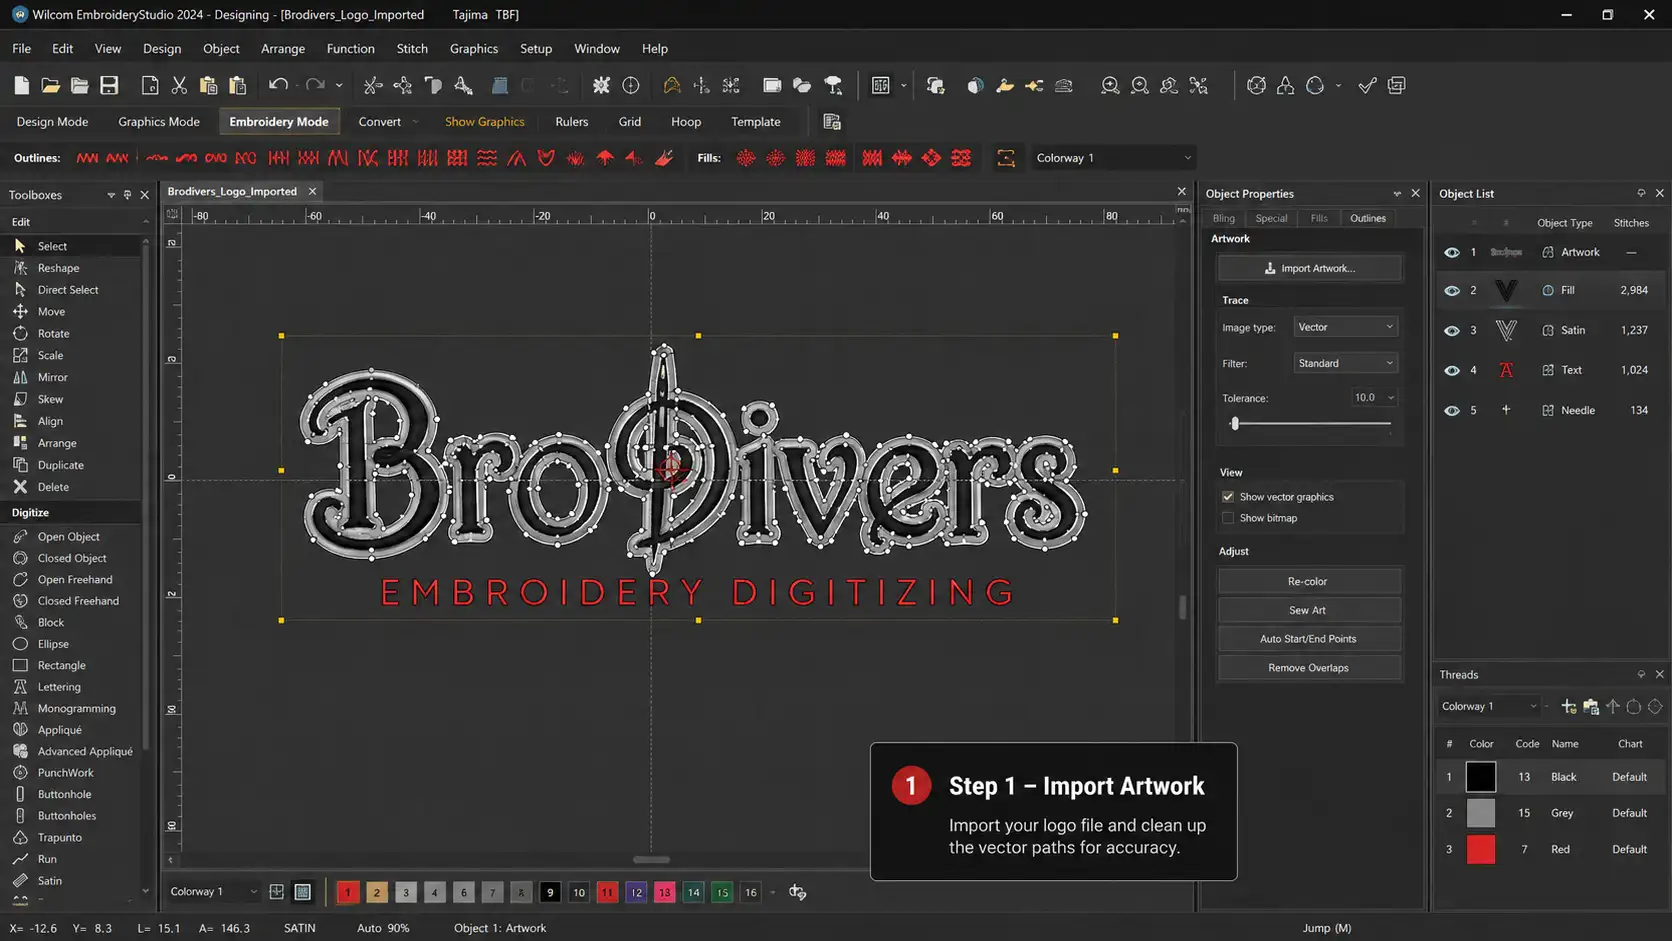
The logo is imported into Wilcom and used as a reference template. Every shape is then rebuilt as embroidery objects rather than simply outlined, since stitches need direction and structure that a traced outline does not provide.
Assign Stitch Types And Settings
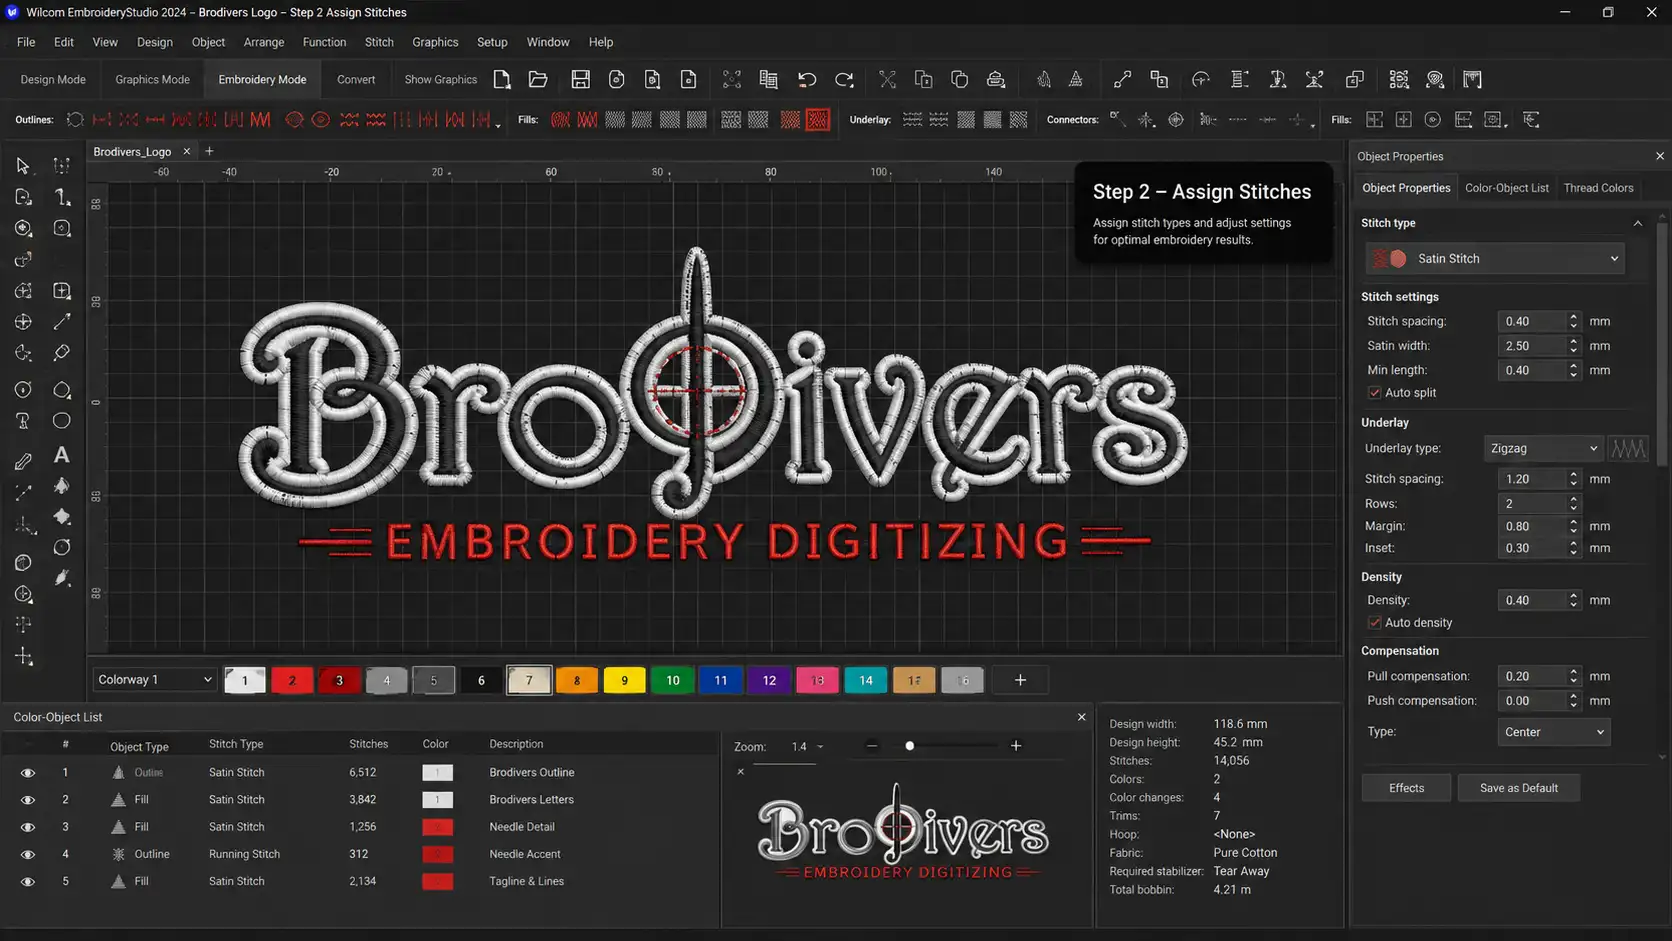
Each part of the logo is assigned a stitch type: satin stitch for borders and lettering, fill stitch for larger areas, running stitch for fine lines. Underlay, density and pull compensation are set based on the fabric discussed earlier.
Run A Stitch Simulation
Before any thread is used, Wilcom can simulate how the design will stitch out, including stitch order and estimated time. This step catches problems like overlapping stitches or unclear letters before they reach the machine.
Export In The Right Format
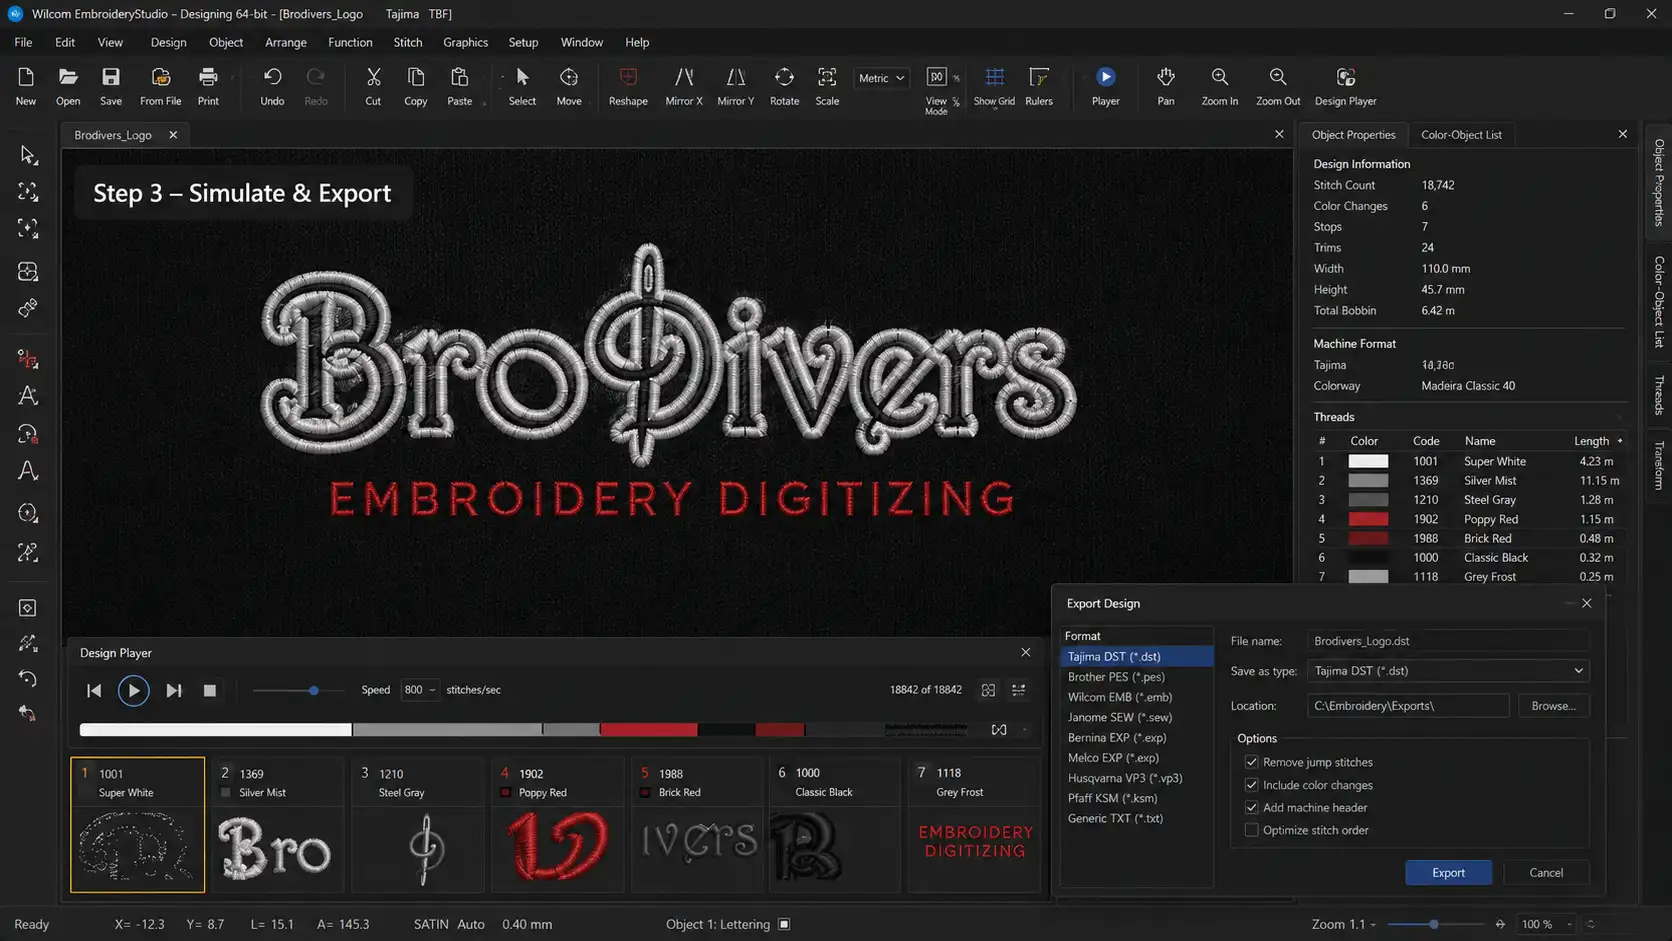
Once the simulation looks correct, the file is exported in the format your embroidery machine needs, commonly DST, PES or EMB. This is also the point where a physical stitched sample is usually produced for approval.
Common Mistakes We See On Client Logos
A few issues come up again and again, and knowing them in advance can save a revision round:
- Logos with gradients that fade smoothly on screen but cannot fade the same way in thread
- Text set below the minimum readable size for embroidery, especially in script or thin fonts
- Colors chosen from a screen without checking available thread colors
- Placement decided after digitizing instead of before, which can force a full redo for size or density
When To Let A Professional Handle The Digitizing
Wilcom is powerful, but reading a stitch simulation correctly and setting the right density for a specific fabric takes practice built from producing embroidery, not just software training. If you need a logo digitized for production, sending clean artwork with the details above already answered will get you a usable file faster and with fewer revisions.